Monday, 14 November 2022

Descent: Journeys In The Dark

Good morning/afternoon/evening everyone!


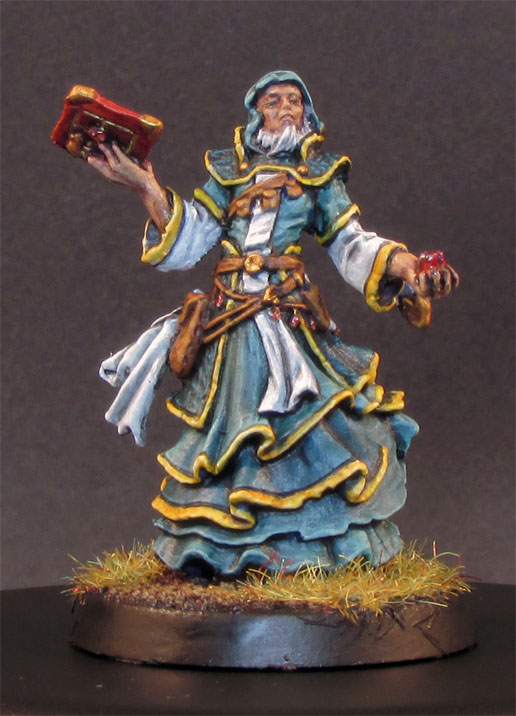
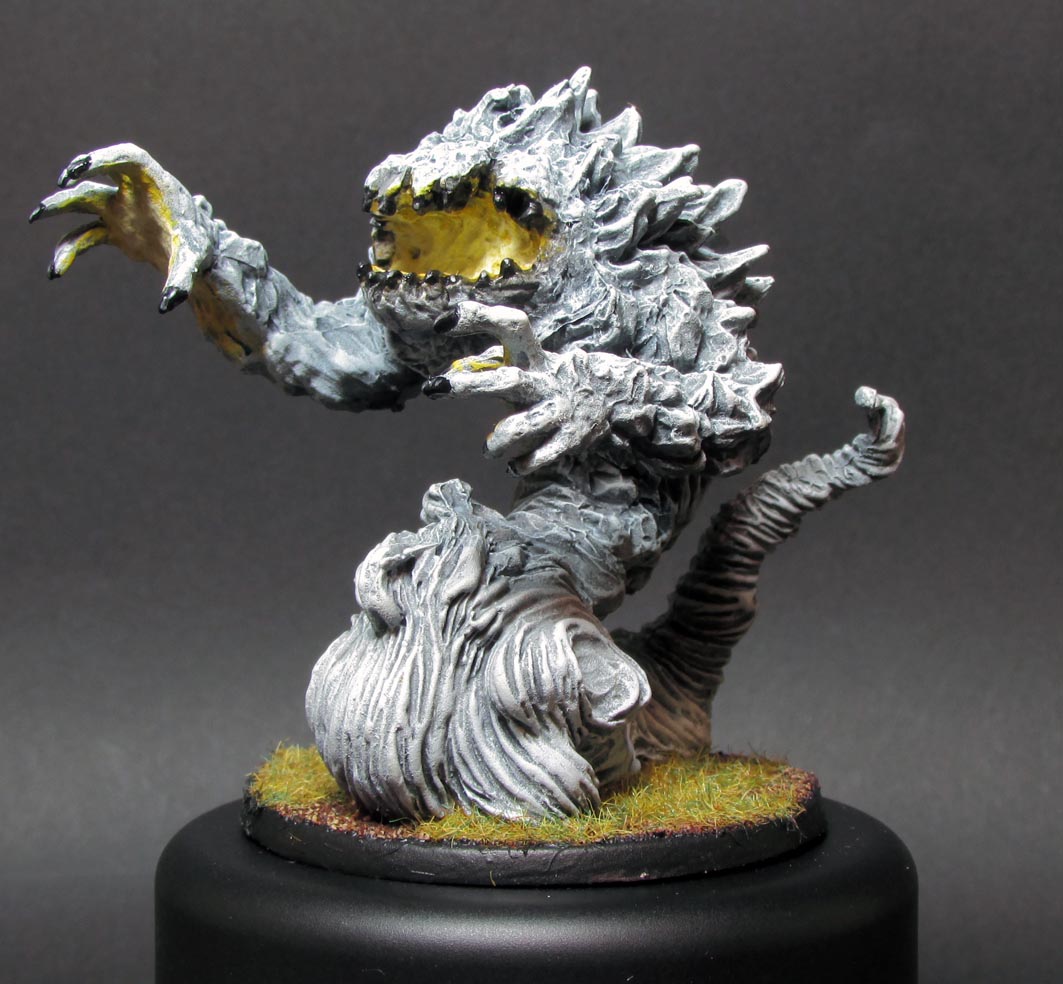
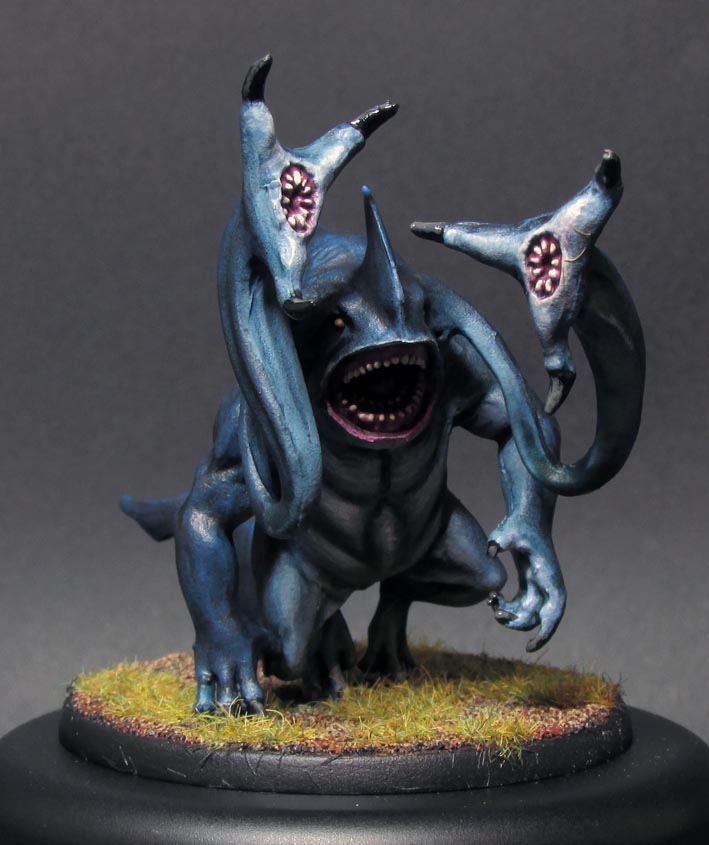
This week, I have decided to delve into the archives a bit, and have a chat about some miniatures I painted a few years ago. This set of miniatures was from the dungeon-bash boardgame Descent: Journeys In the Dark 2nd Edition, produced by Fantasy Flight Games, which is now, sadly, out of print.

These were painted on commission and the brief was to do them to a decent gaming standard, but not to go too over the top on detail and finish. This gave me a bit of leeway to to have some fun with them. The miniatures themselves were quite nice in themselves, with some really characterful sculpts and poses but, as you can see in the pictures, the detailing left a little to be desired. This was mainly, I suspect, due to the material they were cast in. The plastic used was quite soft and flexible, and didn't hold the detail well and was an utter pain in the arse to glean up properly. When trying to sand or cut the mould lines off, the plastic would fragment into tiny fibres, rather than leave a clean, smooth surface. With some of them I simply gave up trying to remove a lot of the mould lines, for fear of destroying any more detail. The other issue was the scale- these were considerably smaller than GW heroic scale (more in line with the GW LOTR miniatures in terms of scale and proportion) and, while I liked the more realistic proportions it did make for a challenge to get them to look good without taking too long on them. That being said, the smaller scale did mean I could take quite a few shortcuts with the main bulk of painting, allowing me to get away with minimal blending and fewer layers of highlights than I would do for larger-scale miniatures. A couple of layers of highlights and some selective glazes was usually more than enough to get the job done. 

THE CHARACTERS

Alric Farrow
Ashrian
Avric Albright
Belthir
Eliza Farrow
Grisban The Thirsty
Jain Fairwood
Leoric of the Book
Merick Farrow
Syndrael
Tomble Burrowell
Widow Tahra
Zachareth

With the characters (some of which I think came from supplements, rather than the main game, I stuck as close as possible to the character art. As you can see, there's bags of character in the sculpts, and there was plenty of scope to have some fun and even play around with some glow and OSL effects.

THE MONSTERS

Barghest
Cave Spider
Air Elemental
Fire Elemental
Ettin
Ettin
Flesh Moulder
Goblin Archer
Merriod
Merriod
Shadow Dragon
Shadow Dragon
Zombie
I had a lot of fun with the monsters and I could play around with the colours a bit more, especially as they all had duplicates. I was particularly pleased with how the Fire Elemental came out (it's a shame there wasn't a couple more Elementals too, to do Earth and Water. The Barghests were fun, too, with all their open wounds. 


Looking back on these now, a good few years on from painting them, I'm still quite pleased with how they turned out. Undoubtedly I would paint them differently now. When I did these, I hadn't discovered the technique of zenithal priming and preshading and there was no such thing as Contrast paints (or the many alternatives that have come out since) and I think those are all tools and techniques that I'd put into play if I was to approach them now. Casting material issues notwithstanding, they are a nice set of miniatures and worth spending the time to make them look good. I'd happily have another crack at them, if asked, and it's a shame that the game is no longer in print.

Next week I'll be having a bit of a ramble on about painting competitions, and what I'm planning for Golden Demon...

Thanks for reading!
Stu

Monday, 7 November 2022

Something Old, Something New, And An Inquisitor In Blue

 Good morning/afternoon/evening everyone!

This week I thought it would be fun to compare and contrast an older miniature with something much more modern. It consists of three miniatures, two of which are part of a vignette, two of which are connected to the other, and one of which is considerably more recent than the other two, but still was painted the same way as one of the others...
Confused? Good! 😀

So, what we have here is a vignette of Ephrael Stern and Inquisitor Hand. This is a metal limited edition, produced by Forge World (I think) in around 2000/2001. I'm in two minds about this set, if I'm honest. The Ephrael Stern miniature is a nice sculpt. It's a little flat, although that's not unusual for the time, but it has lots of nice details and holds up quite well by modern standards. Sadly, the same can't really be said for Inquisitor Hand. For one thing, he's actually quite small compared to Stern and his pose is a little uninspired, and his face is just plain ugly (although I'm guessing that's intentional!) The base, also, is a little odd, being composed of random bits of chaos marines and half of some sort of cultist. There's also no interaction between the two characters in the vignette, so there's no real story to it, and I think they'd have been better served doing them as two separate characters, with their own scenic bases. I can't help but wonder what the sculptors would do with a modern version* especially with GW's penchant for diorama-style bases. Anyway, that negativity aside, it was a lot of fun to paint this set. 

The colour scheme For Ephrael was pretty easy, as there's plenty of pictures of her floating around, plus her Order is known. Inquisitor Hand was a little more problematical, as I could only find one picture of him in colour, and that is Kev Walker's masterful rendition shown below (available as a print here.)


I decided to stick to the same basic idea, of blue, bronze and green, but I decided to go a little more vibrant than the somewhat desaturated palette in the picture, to contrast with the limited colours in the rest of the set. All in all, I'm quite pleased with how it looks in the end. For those who are interested, here's how I did the blue on Hand's armour:
Basecoat of Ultramarines blue contrast over white undercoat. Blended highlights of Sotek Green, Temple guard Blue, Baharroth Blue and Blue Horror. All-over glaze of thinned Leviadon Blue with undiluted Leviadon Blue blended into the deepest recesses.


Bringing things bang up to date, we have this limited edition of Tariana Palos. It's very interesting to compare this miniature to the one of Ephrael Stern, looking at the differences that 20 years of advancements in sculpting and technology has brought. The obvious thing to look at is the increase in level of detail and crispness of the sculpt. The modern plastic miniature is so much smoother and more refined than the old metal one. I know there are those that dislike modern miniatures, that they have less character than old ones but I have to say I much prefer the modern sculpt. Painting the two side by side, as I did here, the modern sculpt does it for me so much more than the old one. The main reason for this, however, is not just because of the detailing on the modern miniature but because of the proportions. The modern miniature is far more proportionally accurate than the old one and, because of that, wins me over every time.


Looking back on the paint job for Tariana, I should have put a little more blue into the highlights on the armour, and given sharper edges. It would have given more definition and shape to the black. also, the burning flame on the base doesn't look right- too much white and not enough yellow. Also, the close-up shot of her face shows I was a little heavy with the shading around her nose. Other than that, I'm pleased with how she turned out. A really nice sculpt, and I'm hoping to do more Sisters in the future. I have a small force that I'm going to put together for a Kill Team at some point, and I may paly around with some single pieces one day.

One final note. While looking up colour schemes for painting these models, I noticed that one of my old paintjobs is still up on the GW website! I painted this Preacher probably 25 years ago and I can't believe they're still using it!


Thanks for reading!
Stu


*I'm aware there's a modern version of Ephrael Stern available. I'm hoping somebody will one day commission me to paint that and Kyganil (and maybe Canoness Verydian or Amalia Novina too**)
**Or any of the Sisters of Battle miniatures, frankly. Particularly the character pieces, like the Triumph of Saint Catherine- a beautiful piece.

Monday, 31 October 2022

The Little Cars Are The Star..


Good morning/afternoon/evening everyone!

Over the last year or so, I've painted rather a lot of giant robots (and a few monsters) for Botwar. It's not all giant robots (and monsters) though. The human factions employ some normal-sized vehicles and, for those of a certain age group, they might be a little familiar. 


These Botwars vehicles are mostly single-piece resin castings (although some of the larger ones come in more pieces) and the castings are crisp and sharp and contain just the right amount of detail for miniatures this size (the cars are roughly 15-20mm long) and the quality of the castings makes them easy and satisfying to paint.

When painting military models on this scale, you can normally get away with a basecoat, drybrush and pinwash but, as these models are based on street vehicles, with much more bright colours often on show, I felt a slightly more detailed approach was necessary, so they were given the sort of techniques usually reserved for larger scale miniatures. 

There's two very important things to be mindful of when working at this scale and at this level of finish. The first is to make sure your edge highlighting is very fine and precise, and that your blends are smooth end even. Also, don't be afraid to have quite a stark contrast between the darkest and lightest colours on any given area, as this will help to give the impression of scale. However, large jumps between colours or thick edge highlights will throw off the sense of scale and leave the end result looking messy, which is why it's important to keep things tidy. It's worth taking the time to be careful how you apply your layers to get a neat, smooth finish, although you could get away with some very careful drybrushing of the main colours. I recommend using a very soft makeup brush if you take this approach. A bigger, stiffer brush would make larger marks and, again, ruin the sense of scale. I spent a couple of hours on the main body panels of each of these vehicles to get them the way I wanted, before finishing them off with the generic details, such as windows, tyres, etc. 

All these models are available as a single set by clicking on the logo below:


Delorean


Over a black undercoat, I painted a coat of Leadbelcher, followed by an all-over wash of Nuln Oil. This was then highlighted with Leadbelcher followed by Ironbreaker, with an edge highlight of Stormhost Silver.

Phoenix**


Over a black undercoat I blended a highlight of a mix of Abaddon Black and Dark Reaper, followed by highlights of Dark Reaper, Thunderhawk Blue and a final highlight, just on the edges of the roof, spoiler, etc. of Fenrisian Grey. The gold was Retributor Armour highlighted with Auric Armour Gold. 

Armadillo


Again, using a black undercoat, the lower half was highlighted with a mix of Abaddon Black and Eshin Grey, followed by Eshin Grey and an edge highlight of Dawnstone. The upper half was basecoated with Eshin Grey, highlighted with Dawnstone and given an edge highlight of Dawnstone/Grey Seer mix. The red was Mephiston Red highlighted with Wild Rider Red.

Nighthawk


I initially made the mistake of painting this black, as I used the wrong reference image, so it has a black undercoat. This one had a basecoat of The Fang, which was highlighted with Russ Grey, then Fenrisian Grey and a very fine edge highlight of Corax White. 

Interceptor


As with the Phoenix, over a black undercoat, a highlight of a mix of Abaddon Black and Dark Reaper, followed by highlights of Dark Reaper, Thunderhawk Blue and a final highlight, just on the edges of the roof, etc. of Fenrisian Grey. 

Freedom Eagle


Over a white undercoat, I applied a basecoat of Gryph-Hound Orange (contrast) which was highlighted with Fire Dragon Bright then Luggunath Orange before being given a glaze of Cassandora Yellow. 

Freedom Eagle 2


The black bodywork on this was done exactly the same way as the Phoenix and Interceptor. The glowing scanner on the front was done with Evil Sunz Scarlet, highlighted with Dorn Yellow then White Scar. This was glazed with Bloodletter, and a couple of glazes were also applied to the surrounding area to give the glow.

Deepdive


Over a white undercoat, a basecoat of Blood Angels Red (contrast) with a highlight of Evil Sunz Scarlet, followed by Troll Slayer Orange then Fire Dragon Bright. An edge highlight of a mix of Fire Dragon Bright/Dorn Yellow was followed by an all-over glaze of a Bloodletter/Carroburg Crimson mix. 

Cyclone


A slightly darker red on this one, which was started with Flesh Tearers Red (contrast) over a white undercoat. This was highlighted with Mephiston Red then Wild Rider Red, Fire Dragon Bright and an edge highlight of Fire Dragon Bright/Dorn Yellow mix. This was then given a glaze of Bloodletter/Carroburg Crimson mix.

Airblade


Over a white undercoat, a basecoat of Thallasar Blue (contrast) was followed by highlights of Caledor Sky, Teclis Blue, Lothern Blue and a final edge highlight of Blue Horror. The jet flames were glaze with a wash of Casandora Yellow. This was then glazed with a couple of coats of Bloodletter, making sure most of the red was concentrated at the bottom. A light drybrush of Mephiston Red was done on the tips.

Buffalo


Again, over a white undercoat, I applied a basecoat of a mix of Thallasar Blue/Ultramarines Blue (both contrast) which was highlighted with Macragge Blue, followed by Altdorf Guard Blue then Calgar Blue, with a final edge highlight of Blue Horror.

Big Bear


Over a white undercoat, a base coat of Volupus Pink (contrast) was given highlights of Pink Horror, then Emperor's Children followed by Fulgrim Pink. This was finished off with a glaze of thinned Carroburg Crimson.

Convoy


Saving the biggest for last! Over a white undercoat, I started with a coat of Flesh Tearers Red (contrast). This was given a basecoat of Khorne Red, leaving the basecoat only showing in the recesses and gaps. This was then highlighted with Wazdakka Red, followed by Squig Orange and Fulgrim Pink. I then glazed this with a couple of coats of thinned Carroburg Crimson. The jet flames were done the same way as with Airblade.


And that's the lot! How many did you recognize?

Thanks for reading!

-Stu


*A point for each one you recognise...

**The temptation was to paint this one gold. A bonus point for you if you know why.... 

Monday, 24 October 2022

Shiver Me Whatsits! It's An Ogre Pirate

Good morning/afternoon/evening everyone!

This week, I'd like to talk to you about this chap:

He is Gorlok Blackpowder and he is the leader of Blackpowder's Buccaneer's, a warband for the hugely successful Warhammer Underworlds game. I painted him for a recent competition held in my local GW store. The competition was held to launch the newly updated Citadel Contrast and Shade paint ranges and had to be something bought especially for the competition and had to make extensive use of the new paints. This would not be an issue for me as, since the launch of the Contrast range, I don't think I've painted a single miniature without using them in some way or another.* I've found them to be incredibly versatile, useful as glazes, shading washes, additions to base and layer paints for colour variations...I've even used them for their advertised purpose, on occasion!

As for painting this particular miniature, I was going to go through each stage, step-by step and describe each paint used and when, but I have decided against doing this, as I never originally planned to write an article about the painting of this miniature, didn't take step-by-step photos so I don't have anything with which to illustrate such an article. Without pictures there's not a lot of point. So what I've decided to do is instead focus on a particular technique that was used on the majority of this miniature. See, what I wanted to go for when I started painting was texture. I wanted his equipment to look old and weathered, without the smooth highlights that are my usual style. I still wanted it to be clean and bright, and based on the 'eavy Metal style, but I wanted there to be a certain amount of wear and tear and worn-in-ness to his clothing. As it was, I couldn't take it as far as I wanted to as I ran out of time to get him finished by the deadline for the competition but I was pretty happy with the way it turned out, particularly the leather of the coat, and this is what I'm going to talk about in this article.

So, for all the leather areas (the red of the coat, the black coat lining, the boots and the shoulder bag) I utilised a loose style, stippling and flicking the brush across the surface to give loose, random highlights, imitating a worn, battered effect. It's a really good idea to look at reference with things like this**, as it can show you things that you wouldn't necessarily have thought about. For instance, with old leather, where it wears away from use it naturally forms its own folds over time and, if not treated, those folds will crack and, being more exposed, will naturally get scratched and their colour will fade. when the colour fades and the surface cracks, the natural tan colour of the leather will show through and this is something that you should bear in mind when painting. The highlights of the colour will be the lighter tone of the base (eg. for black, it will be grey) but the areas of wear will be light brown. If you look at these pictures below, hopefully you will see what I mean. 


There's a clear difference between the grey highlights for the black, and the tan areas to show wear. I did the same on the boots but, obviously with the boots being brown, the difference is not as marked, although the effect is still there. As for how it was achieved well there's no great magic to it. I started each area with a very thin basecoat, using Contrast paints, sometimes mixed with Shades and then applied a deeper shade, wet-in-wet, to make it look patchy and uneven. I then used layers of opaque paints Bases and Layers, to build up the highlights. As I mentioned, these were not blended at all and were applied in a mixture of stippling (to build up the texture) and flicking across the surface (to simulate scratches and random wear.) Finally a highlight of light tan (I used Morghast Bone on all the leather areas) was applied more carefully to show the cracks and splits where the inner leather is showing through. I also added careful light drybrushing of this colour (used sparingly) to show where the top surface had been scuffed off. I then followed all this up with glazes close to the base colour, applied all over at first. These were very thin, applied carefully, the idea being to just smooth the transitions a little, but not too much. A stronger, more saturated glaze was then applied in the deepest recess (again, wet-in-wet, to allow a certain amount of bleeding into the thin all-over glaze). In the pictures below, you can see the difference between the red pre- and post-glaze (apologies for the discrepancies in the photos, they were taken while working on the miniature in less-than-ideal conditions for photography. Hopefully you'll get the idea.) 


As I said, I had then planned to go back and re-establish some of the cracks in the light tan, but I ran out of time. Maybe next time.

So, here's the end result.

In the competition he got second place, which I was chuffed with. In terms of the actual painting, I wanted to experiment with textures and work on my NMM and, in that regard, the project was a success. As I said, I'd love to have had the time to do more work on the wear and tear on the leather areas, and I'm still not 100% satisfied with the NMM, but I'm getting there. I had a lot of fun with this miniature. It's got bags of character, and one of those models that is a dream for the painter, with loads of areas of different texture to play with. At some point, I'm going to have to get round to doing the rest of his gang...

For those who are interested, here's the colours used:

BOOTS: Base: Garaghak's Sewer; Shade: Agrax Earhshade/Nuln Oil; Highlights: Doombull Brown, Tuskgor Fur, Jokaero Orange, Morghast Bone; Glaze: Agrax Earthshade/Athonian Camoshade; Recess Glaze: Garaghak's Sewer

JACKET: Base: Flesh Tearers Red; Shade: Nuln Oil; Highlights: Mephiston Red, Evil Sunz Scarlet, Morghast Bone; Glaze: Bloodletter***; Recess Glaze: Flesh Tearers Red

JACKET LINING: Base: Basilicanum Grey; Shade: Black Templar; Highlights: Eshin Grey, Mechanicus Standard Grey, Dawnstone, Morghast Bone; Glaze: Nuln Oil; Recess Glaze: Black Templar

SHOULDER BAG: Base: Snakebite Leather; Shade: Garaghak's Sewer; Highlights: Flayed One flesh, Morghast Bone; Glaze: Seraphim Sepia; Recess Glaze: Agrax Earthshade

That's all for now, see you next week, where I'll be talking about some teeny-tiny little cars... 

Thanks for reading!

Stuart


*plus, I hardly needed an excuse to buy more paints, or  new miniature specifically for the competition... 

**And don't restrict yourself to looking at, for example, old coats as reference for old coats. Think about other things that might have old leather on them. I found some great reference looking at old sofas and writing desks...

***it's a real shame that GW have discontinued the glazes. I know they're easy to replicate but having them ready-mixed in the perfect colours, density and opacity was really useful, and I'll miss them once I've used them up.

Sunday, 16 October 2022

Reports Of My Blog's Demise Were Greatly Exaggerated! (By...errr, me, mostly...)


Good morning/afternoon/evening everyone!

After an absence of about 18 months, the Sublime Brushwork blog is back! For those who are followers of old, I'm sorry I've been away for so long, I'll try and make up for lost time. For those who are here for the first time, a brief introduction:

My name is Stuart Thomas and this, here, is my blog where I will write about stuff and things. 
Want a bit more info? Okay, most people know me as a former member of the Games Workshop 'Eavy Metal studio miniatures painting team (circa 1992-2001)* which is a very grand way of saying I painted toy soldiers for a living. Since then, I've done a variety of jobs, with varying degrees of lack of success, and I've come full-circle, back to trying to earn a living painting toy soldiers**. If you really want to know more, check out the Middlehammer Memory Lane, an autobiography of my time as a member of 'eavy Metal.

The purpose of this blog is to air my thoughts and indulge my love of rambling on about stuff, and spare the almost-but-not-quite infinite patience of The Better Half from said ramblings. Hopefully, some of what I write will be of interest to others. Most of it will relate to the world of miniature painting and games, but they may also include random thoughts about all sorts of things (usually thought of while in the shower*** or while doing the washing up or doing the cleaning at work****.) I've also been known to sometimes experiment with drawing, painting and writing and I may well subject some of those things for public scrutiny, if I feel brave enough but, mostly, it's going to be me talking about stuff I've painted. The main thing, for at least, is to have an outlet for my thoughts and ideas, techniques, inspirations, and anything else that comes to mind. You might even see reviews and videos, eventually.***** I have a gallery of the work I've done for Stuff Of Legends, which I'll update soon, and I've got a couple more galleries like that planned. 

I also want to throw in some actually useful stuff, tutorials and painting guides and the like, and I want to throw this open to you all out there in reader-land. If there's a particular technique, colour, style, effect, etc. that you are struggling with, drop me a line and I will do my best to help with it here.  I'd love to hear your opinions and any thoughts you have, or suggestions for content, etc. There's obviously going to be a period of finding my feet, seeing what works and so on, and any feedback or suggestions would be really useful. 

I'm  going to try and maintain a regular schedule of weekly posts but I know only too well how real life can interfere with the best laid plans, and I don't have anything even close to what could be described as  a "best-laid plan" so we'll have to see how it goes. 

If you want to see more of what I'm up to on a day to day basis, I (usually) post a daily update on Instagram, Facebook and Twitter so please feel free to follow on any of those. I really hope there will be some stuff of interest to you here. If that's the case, please feel free to join in by leaving comments and sharing it about a bit amongst your social medias. Anything that would help spread the word of what I'm up to here would be deeply appreciated.

The plan is to put up a new post every Monday and, next Monday, it all kicks off with a bit of chat about how I painted this guy. I hope you'll join me!


Welcome to the inner workings of the Stuey mind*****.

Thanks for reading!

p.s. if you like what I'm doing here, a click on the link below and the donation of the price of a pot of paint would be a wonderful gesture. I'm thinking of adding special stuff to the Ko-fi, like competitions and prize draws, so it'd be a good idea to at least have a look there now and then 😁 


*actually, most people who actually know me, know me as that annoying hairy guy who dresses funny and makes awful jokes

**amongst other things. I'm also a part-time night care assistant. I'm a keep-my-eggs-in-more-than-one-basket kinda guy...

***it's best you don't try to think about that bit...

****the life of a care worker is full of glamour..

*****if I ever get a setup sorted out and figure out how to do it

******such as it is...


Tuesday, 9 March 2021

Things And Stuff

 Good morning/afternoon/evening everyone!

This week I'm just going to do a brief post giving a shout out to some cool things out there, a few of which I have a personal interest in. 

First up is the launch of HeroHammer Fanzine. If you're a GW fan of a certain age, you will feel right at home with this new fan-made publication, brought to you from the guys at Crown Of Command. Within it's White Dwarf-inspired pages you'll find painting guides, armies, battle reports, rules...in short, everything you'd like to see in a celebration of 90's-era GW. A lot of work has gone into it and, best of all, it's totally free! My involvement in the first issue has been minimal, but I'm hoping to get a fair bit of my painting in there in coming issues. Click on the image below to be taken straight to the webpage, or click here. 


Next up is something that I've been involved in for a bit longer. If you head over to the 'Eavier Metal Facebook page this Thursday, you will see the winners of this year's 20 Year Challenge painting competition. I think this is the 6th year I've been judging this annual competition and it doesn't get any easier. The basic premise is that, in ordermto qualify, the miniature entered must be at least 20 years old (but can be, of course, a modern paint job.) The scary thing is that, from next year, miniatures released since I left GW will be eligible. 20 years since I left GW...Fuck, I'm old... Anyway, Dave Taylor does a fantastic job running the competition each year, then I leap in at the end, judge it and get all the glory! At least I've not yet had any hate mail from those who didn't win. Obviously it's too late for this year's competition but there's always next year. Click on the image below to be taken to 'Eavier Metal and check in on Thursday for those results...


Next up is something that's all my own work. If you've been looking at my Stuff Of Legends gallery* you'll know that I've done a fair bit of painting for Richard "Orclord" Hale, carving out my own little corner of his incredible miniatures collection. Well, Richard has decided to collect that corner into one page on his Stuff of Legends site. This is really great because a) it's reminded me of quite a few miniatures I'd forgotten about and b) makes it much easier to use his pictures on my page 😁 Richard's gallery can be found by clicking on the toilet below...


Finally, something that I have no involvement in at all, but which certainly deserves a shout out. Long-term readers of this blog will know I'm a big fan of 28 Mag, the magazine of grimdark. It's an incredibly high-quality, totally free publication and I cannot recommend it enough. This week, they've put out a special issue for International Women's Day, with 50+ pages celebrating female creators in the hobby. Click on the image below and download your copy right now. You won't regret it. 


Ooh, one last thing. I've updated my Middlehammer Memory Lane page with a look back to November 1993 and a certain bright red tank. Go take a look. Wear sunglasses.

That's all for this week. Next week, if all goes according to plan, I'll be talking about how I painted some teeny tiny cars...

Thanks for reading!
-Stu


*and if not, why not...?


Tuesday, 2 March 2021

Titter Ye Not, Balders, And Don't Mention The War!

Good morning/afternoon/evening everyone!

In this week's blog post I'll be looking at a commission piece that I did last year. Seeing as Richard Hale has recently posted this figure to The Stuff Of Legends, I thought it'd be a good time to say a few words about how he was painted.

He's a design from the early 2000's (a Brian Nelson sculpt, I think), when GW was going for a more generic look to their ranges (not my favourite periods aesthetically, if I'm honest) and, as such, he has no iconography on him, not even a chaos star, and certainly nothing to indicate what power he follows. Despite this, the sculpt itself is quite characterful, but was never released. As I've heard of it being referred to as the "Adolf sorcerer" I'm guessing his resemblance to a certain historical figure is why GW changed the head for a horned skull* for the released version.
Personally, I think he looks more like Rowan Atkinson. Or maybe Frankie Howerd. 

One thing I really don't like about the miniature, though, is the horse. There's nothing wrong with the sculpt of the horse's head (although, what's with the little skull on spider's legs familiar thing holding the reins?) but why did it have to be married up with a generic plastic horse body? It looks awful, the head doesn't fit properly and the two parts don't match at all. Surely a character model, one of the leaders of an army, could have had a one-off horse to ride?
As for the painting, well, as there was no clear power at work here, I took my lead from all the bones and skulls on it and headed for a traditional Nurgle feel, with lots of natural greens and browns.

I started by laying down a load of Contrast washes over an Athonian Camoshade underpaint.
These were:
Flesh: Darkoath Flesh/Plaguebearer Flesh 1/1
Armour: Militarum Green/Black Templar 3/1
Cloak Lining: Guilliman Flesh/Plaguebearer Flesh 1/1
Bone: Skeleton Horde
Horse: Gryph-Charger Grey/Gore-Grunta Fur 1/1
Robe: Basilicanum Grey/Plaguebearer Flesh 1/1
Staff: Cygor Brown
Bag and Boots: Cygor Brown/Skeleton Horde 1/2
Leather: Cygor Brown/Snakebite Leather 1/2
Fur: Nazdreg yellow/Snakebite Leather 1/1
Hair: Black Templar/Apothecary White 1/1
Scrolls: Skeleton Horde/Plaguebearer Flesh 1/1
Then the metallics were given the following basecoats:
Brass: Runelord Brass
Metal: Chainmail
Gold: Retributor Armour
Then the whole model was given a couple of glazes of thinned Athonian Camoshade to unify the colours and provide a bit of deep shading.
Once that was dry, the fun really began!
The first area I tackled was the face. This was given a highlight of Pallid /wych Flesh before being given various glazes to give it some colour. I'm afraid I didn't note down which ones were used, but it would have been greens and red, with a bit of blue around the eyes and blue/grey around the chin. A final highlight of Pallid Wych Flesh would finish it off.
The armour was highlighted with Loren Forest, then Ogryn Camo and Kreig Khaki before a glaze of Athonian Camoshade was washed over it to smooth and unify the colours. A final highlight of Kreig Khaki finishes off the armour.
The robe was given a highlight of Ironrach Skin, followed by Deepkin Flesh.
The fur was given a drybrushed highlight of Flayed One Flesh followed by Wraithbone, before being given shading washes of Seraphim Sepia, Agrax Earthshade and Nuln Oil.
The horse fur (hair?) was stippled with Steel Legion Drab, followed by Karak Stone then a glaze of Agrax Earthshade. This was then followed up with careful drybrushes of Karak Stone and Screaming /skull, before given washes of Reikland Fleshshade, Agrax Earthshade and Nuln Oil.
The cloak lining was highlighted with Tau Light Ochre, Ungor Flesh and Pallid Wych Flesh before being glazed with a mix of Reikland Fleshshade and Athonian Camoshade.
The staff was highlighted with Gorthor Brown and Baneblade Brown before being given a wash of Agrax Earthshade.
Leather areas were highlighted with Tau Light Ochre, Zamesi Desert and Wraithobne before being given a glaze of Snakebite Leather followed by Agrax Earthshade.
Bones and skulls were given a highlight of Ushabti Bone, followed by Screaming Skull then Wraithbone, a glaze of Athonian Camoshade and a final highlight of Wraithbone.
Parchments were given a highlight of Karak Stone, followed by Pallid Wych Flesh and White Scar, followed by a wash of Seraphim Sepia. The iconography was done with Fleshtearers Red.
The little areas of gold were picked out with Retributor Armour, highlighted with Liberator Gold and Stormhost Silver.
Bronze areas were picked out in Sycorax Bronze, highlighted with Stormhost Silver and given a wash of Athonian Camoshade.
The metal areas were given a coat of Leadbelcher, highlighted with Stormhost Silver and given a wash of Agrax Earthshade/Nuln Oil mix.
Gems were given a careful wash of Hexwraith Flame followed by Coelia Greenshade then a highlight of White Scar and a glaze of Waywatcher.
Finally, the base was done with a basecoat of Mournfang Brown then drybrushed with Steel Legion Drab, Zandri Dust and Karak /stone before getting a wash of Agrax Earthshade. The stones were painted with Mechanicus Standard Grey, given drybrushed highlights of Dawnstone and Deepkin flesh before getting a wash of Athonian Camoshade/Nuln Oil mix.
And we're done!
Total time was a round 12 hours and I'm quite happy with the result. He looks kinda Nurgle-y but there's more of a feel of a traditional wizard gone to the dark side, which I think really works for this miniature.

Thanks for reading!
-Stu


*Because what this miniature needed was another skull...